Quick Start
This guide will assist you in setting up and running tests against your API using our platform. By the end, you'll have:
- Executed tests against your API using the Self-Hosted mode
- Reviewed the results to better understand how your API behaves under different conditions
- Optional: Uploaded test results to Schemathesis.io for further analysis
Prerequisites
- API specification (file, URL, or raw JSON content). We support OpenAPI and GraphQL.
Getting Started
Step 1: Sign up to Schemathesis.io
Begin by signing up for a Schemathesis.io account. Once signed up, you'll be directed to the onboarding page.
Then you have two options:
- Explore Demo Project: Selecting this option creates a new Demo project and runs the tests immediately, allowing you to see Schemathesis.io in action live without installing anything. For more details about the demo project, visit the demo app page.
- Setup Your Project: Selecting this option will allow you to create your own project and start testing your API with Schemathesis.io.
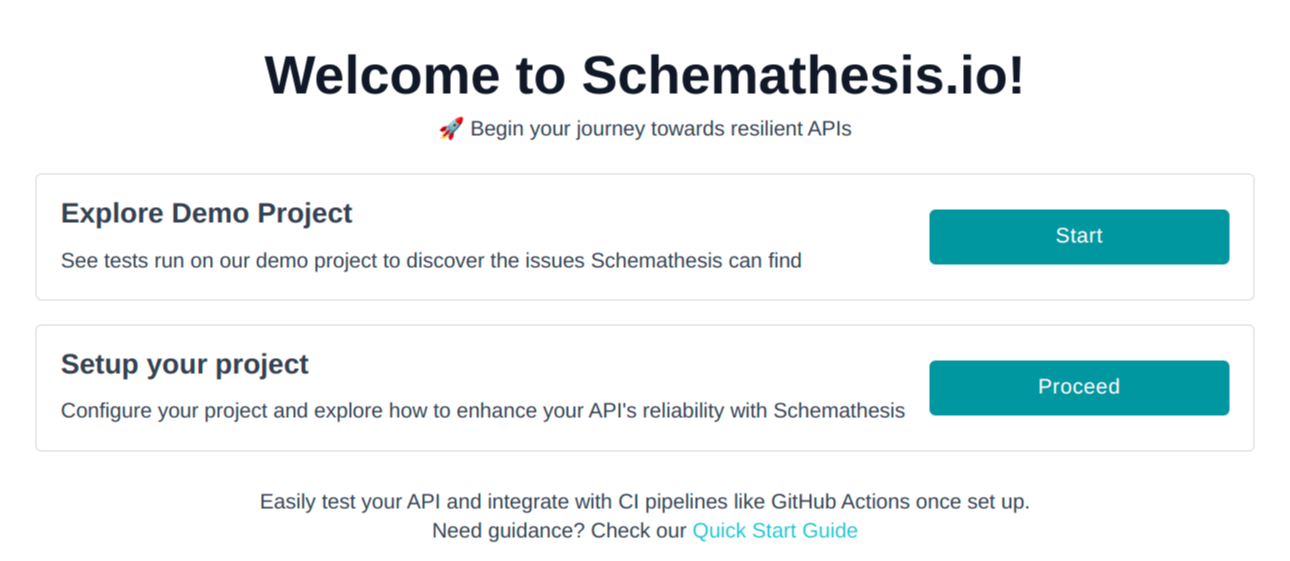
Let's move forward with creating your new project.
Step 2: Create a New Project
Creating a new project is a straightforward process that begins with importing your API specification and ends with a simple project configuration.
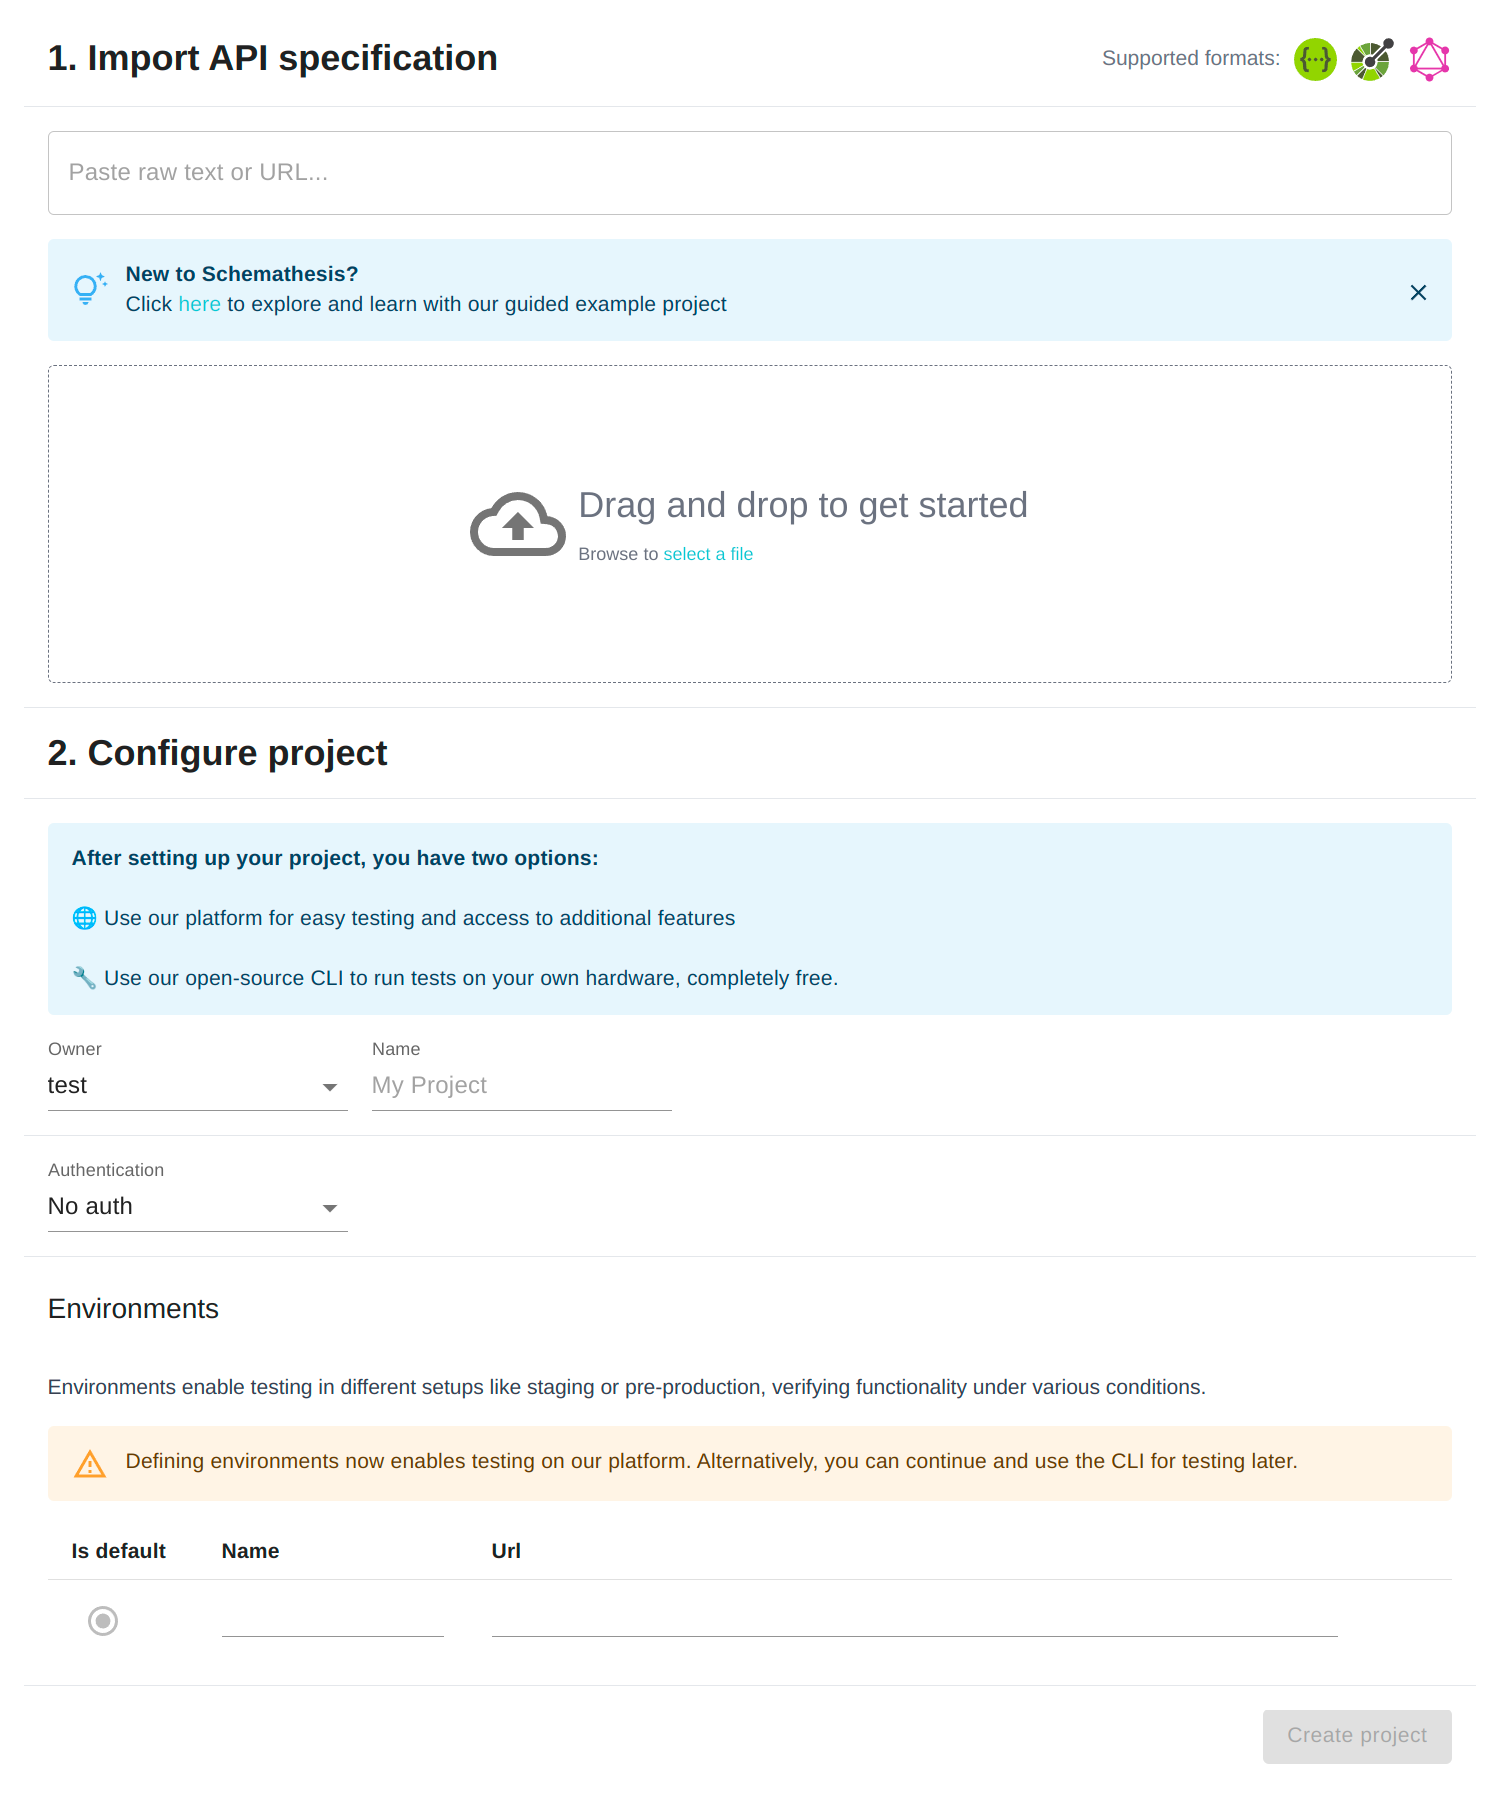
Import Specification:
- Drag and drop your spec file, paste the URL to your spec, or paste the raw JSON content.
- Ensure your spec total size is under 15 MB.
Name Your Project:
- The project name may be pre-filled from the API spec, but you can type in a different name if you prefer.
Create Project:
- Click "Create Project".
- If there are any issues with your spec, you'll see error messages. Fix any issues and click "Create Project" again.
Step 3: Install CLI
In this step, you'll set up the Schemathesis CLI on your machine. This setup allows for direct test execution which is ideal for initial experimentation and development.
You can install Schemathesis using Docker or Python. Docker isolates Schemathesis from your system, eliminating potential conflicts, but might have more overhead. Python installation is more straightforward but requires a Python environment setup.
- Docker
- Python
Prerequisites: Docker 17.05 or higher.
docker pull schemathesis/schemathesis
# Verify installation
docker run schemathesis/schemathesis --version
Prerequisites: Python 3.7 or higher.
python -m pip install --upgrade schemathesis
# Verify installation
schemathesis --version
Step 4: Authentication
To associate your test reports with your Schemathesis.io account, you'll need to log in via the CLI. This way, you won't have to enter your token for each command.
- Go to the Getting Started page of your newly created project on Schemathesis.io.
- In the Authentication section, click the Generate Token button to create a new token. If it's your first time, a command will appear below the button.
- Docker
- Python


- Copy the entire command, which will look like
schemathesis auth login <your_token_here>, and paste it into your terminal. Make sure to replace<your_token_here>with the actual token generated.
Don't worry, you can always manage your tokens in your account settings.
Step 5. Running tests
Now you're ready to start running tests against your API. Execute the following command in your terminal to initiate testing:
- Docker
- Python
docker run schemathesis/schemathesis run <PROJECT_NAME> --checks all --report
schemathesis run <PROJECT_NAME> --checks all --report
schemathesis run: This is the command to execute tests.<PROJECT_NAME>: Replace this with the name of your project on Schemathesis.io.- Alternatively, you can use a local URL to your API schema by replacing
<PROJECT_NAME>with<SCHEMA_URL>in the command. --checks all: This flag instructs Schemathesis to run all available checks.--report: This flag will generate a report of the test run which can be viewed on Schemathesis.io.
Remember, it's crucial to run tests in a safe environment, such as a staging or development environment, and never in a production environment to avoid any unintended disruptions or data changes.
Once the command executes, you'll see a summary of the test results in your terminal. For a more detailed analysis, you can view the generated report on Schemathesis.io under your project's test runs section.
Once the tests are run, a summary will be displayed in your terminal, and a report link will be provided for a more detailed analysis on Schemathesis.io. Here's an excerpt of what the CLI output may look like:
================================================ SUMMARY ================================================

Performed checks:
    not_a_server_error                              618 / 685 passed          FAILED
    status_code_conformance                         668 / 685 passed          FAILED
    content_type_conformance                        683 / 685 passed          FAILED
    response_headers_conformance                    685 / 685 passed          PASSED
    response_schema_conformance                     681 / 685 passed          FAILED
    max_response_time                               628 / 685 passed          FAILED

Compressed report size: 28 KB
Uploading reports to https://api.schemathesis.io/ ...
Upload: COMPLETED

Your test report is successfully uploaded! Please, follow this link for details:

https://app.schemathesis.io/r/tF0ie/

========================================== 11 failed in 61.81s ==========================================
The above output is compressed for brevity. During an actual test run, each failure will be detailed, helping you to understand and rectify issues found in your API.
Viewing Test Results
After running the tests, a link to the test run detail page on Schemathesis.io will be displayed in the CLI. Click on this link to view a comprehensive summary of the test results.
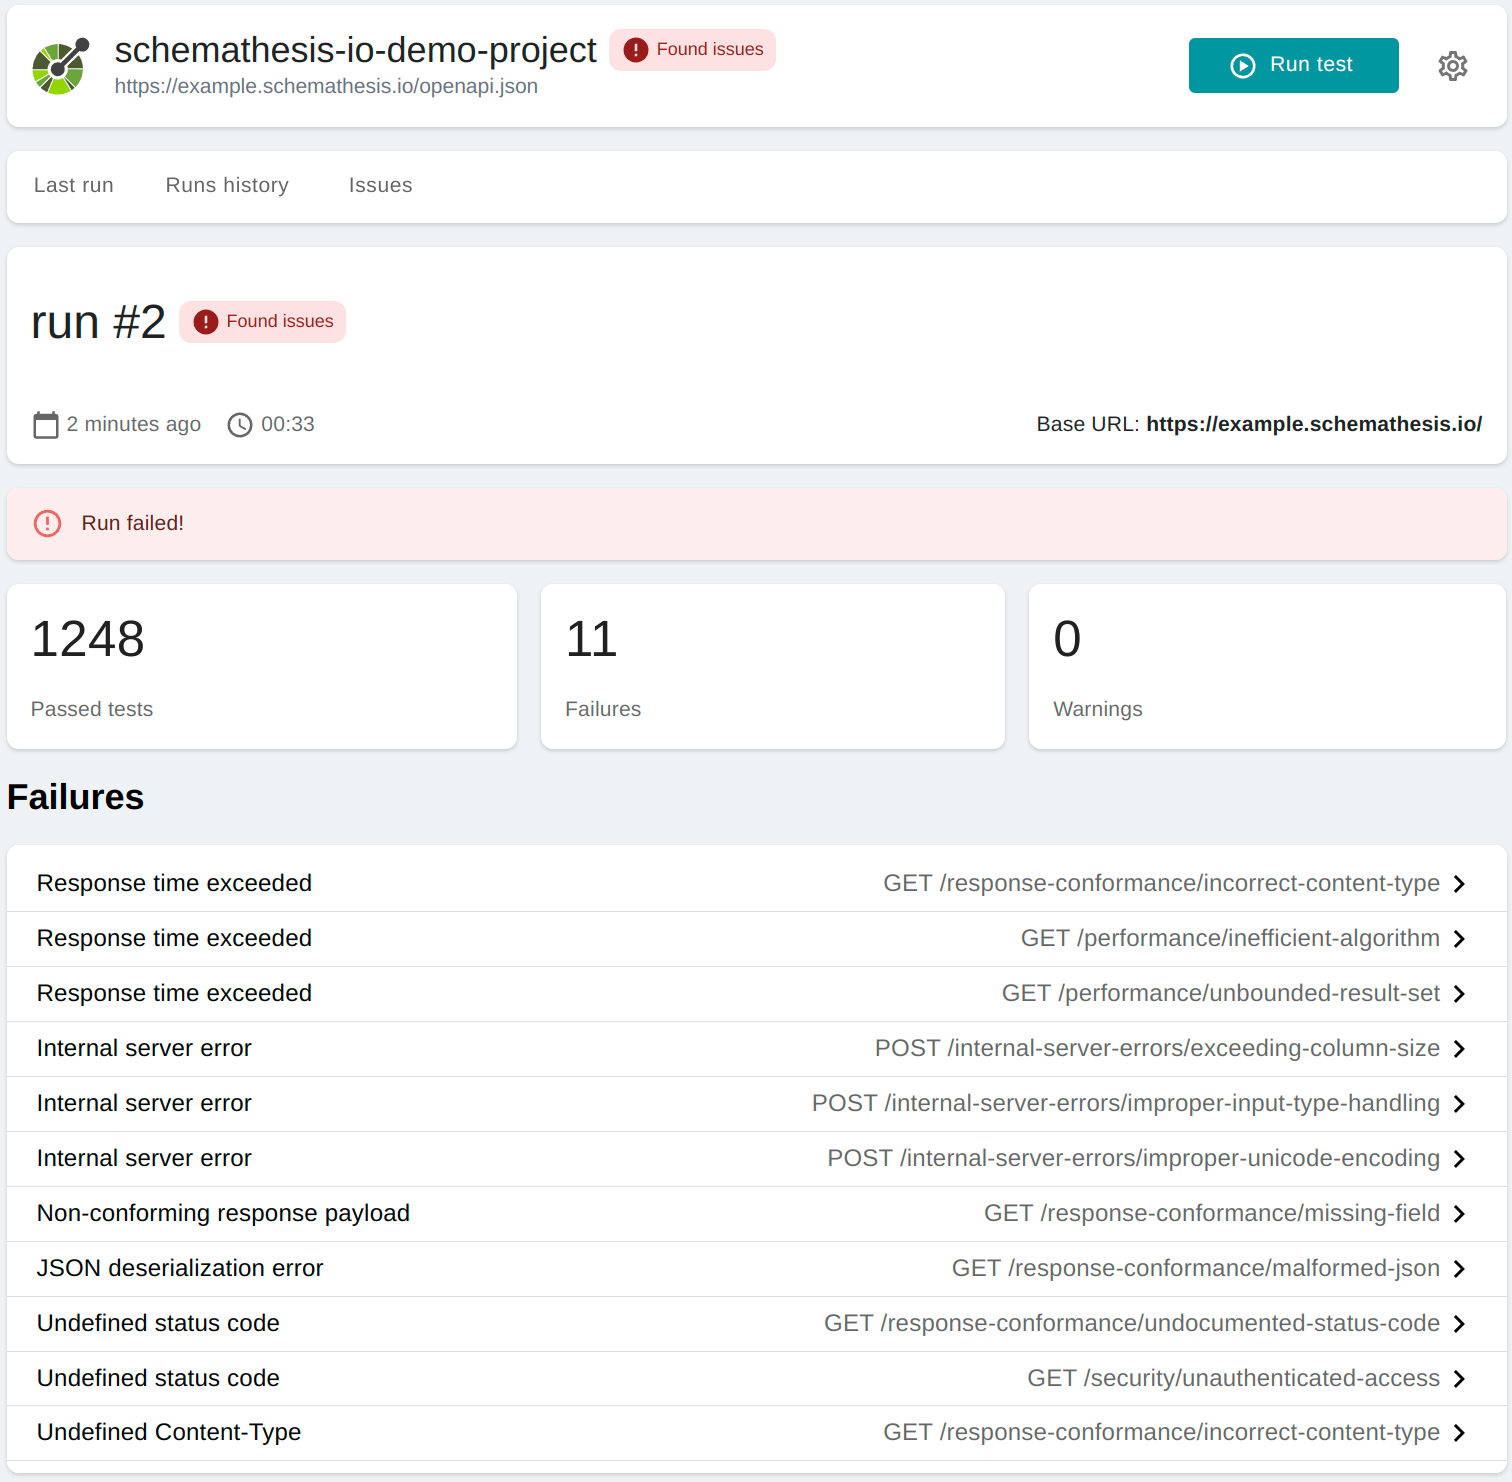
On this page, you'll find:
- A summary of the test run, including the total number of checks and the number of unique failures.
- A list of failures encountered during the test run.
Digging Deeper into Failures
For a more granular view, click on any failure listed to see the detailed information.
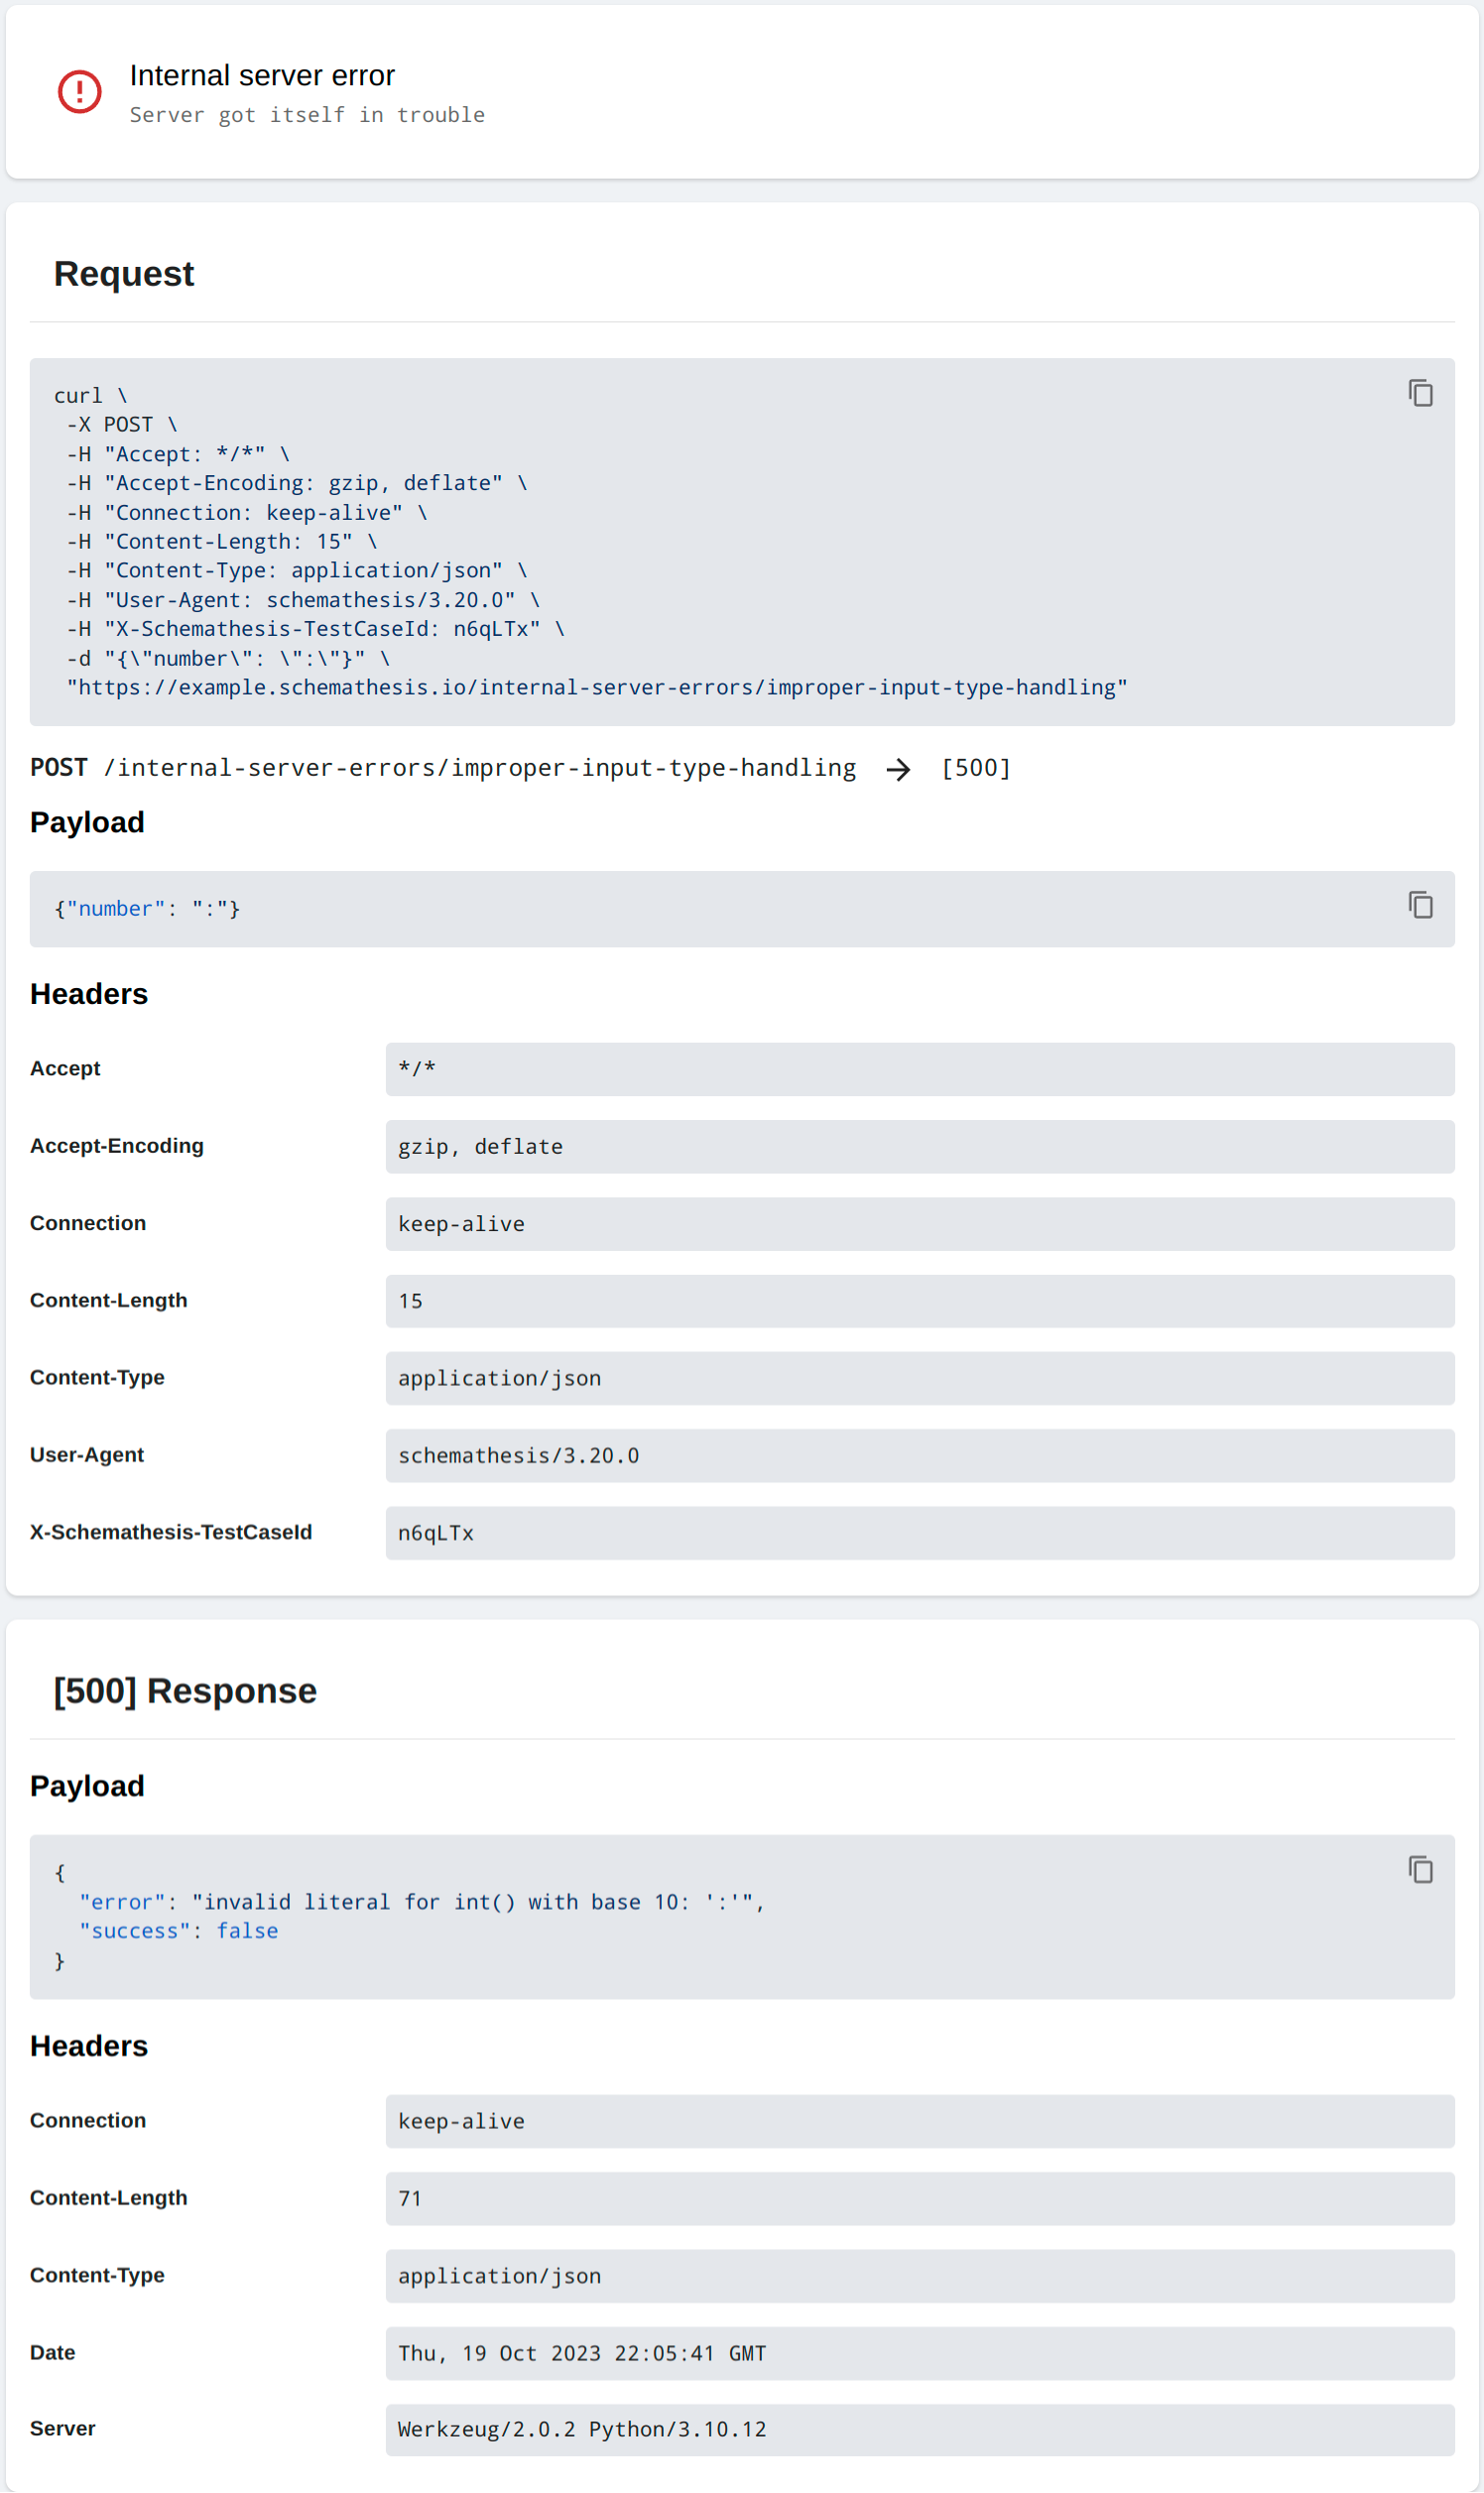
In the failure detail page, you'll find:
- The description of the failure.
- The payload and headers sent in the request that caused the failure.
- The received response from your API.
- Suggested cURL commands to manually reproduce the issue.
- Any additional context that might help in understanding and fixing the issue.
By reviewing the detailed information on each failure, you can identify and fix issues in your API to ensure it behaves as expected under various conditions. Feel free to explore other features on the report page to get a well-rounded understanding of your API's behavior.
In case of any issues or unexpected outcomes during the testing process, reach out on our Support Channel.